Introducing the Xentara Workbench

This guide introduces the Xentara Workbench, a free tool for configuring complex data models in a graphical environment, and describes its basic functionality. The reader learns where to find the Workbench, how to install ist, how to load existing model files, and how to configure data model elements.
At the heart of every Xentara instance, whether you are creating a software-based control instance for a new device or making an entire line of legacy machines IoT-ready, lies the Semantic Data Model. It defines everything going on in a Xentara-powered system, bringing together data points, I/Os, field buses and lots of other components. The Data Model also handles security by assigining access rights on a role-based or per-user basis.
💡 You can learn more about the Xentara Data Model in our extensive developer documentation.
Integrating all these systems, buses and IT interfaces into a Data Model can be a daunting task. That's why we have developed the Xentara Workbench, a free tool for creating and editing Data Model files. This article will provide a short introduction into how to install and use the Workbench.
1. Installation
⚠️ Please note that the Xentara Workbench is currently only available for Windows. You can run it in a virtualization environment like Wine on Linux or Parallels on a Mac.
To install the Xentara Workbench, simply head to https://download.xentara.io and, if necessary, scroll down until you can see the entry "Xentara Workbench". Here you can choose between a version for x64 or arm64 based systems. If you don't know what kind of processor your system uses, it's safe to assume you need the x64 version. Arm processors are mainly used in tablets or low power notebooks. After downloading the installer, just run it and the Workbench will be installed.
2. Configuration
Once you start the Workbench for the first time, you will be greeted by this screen:
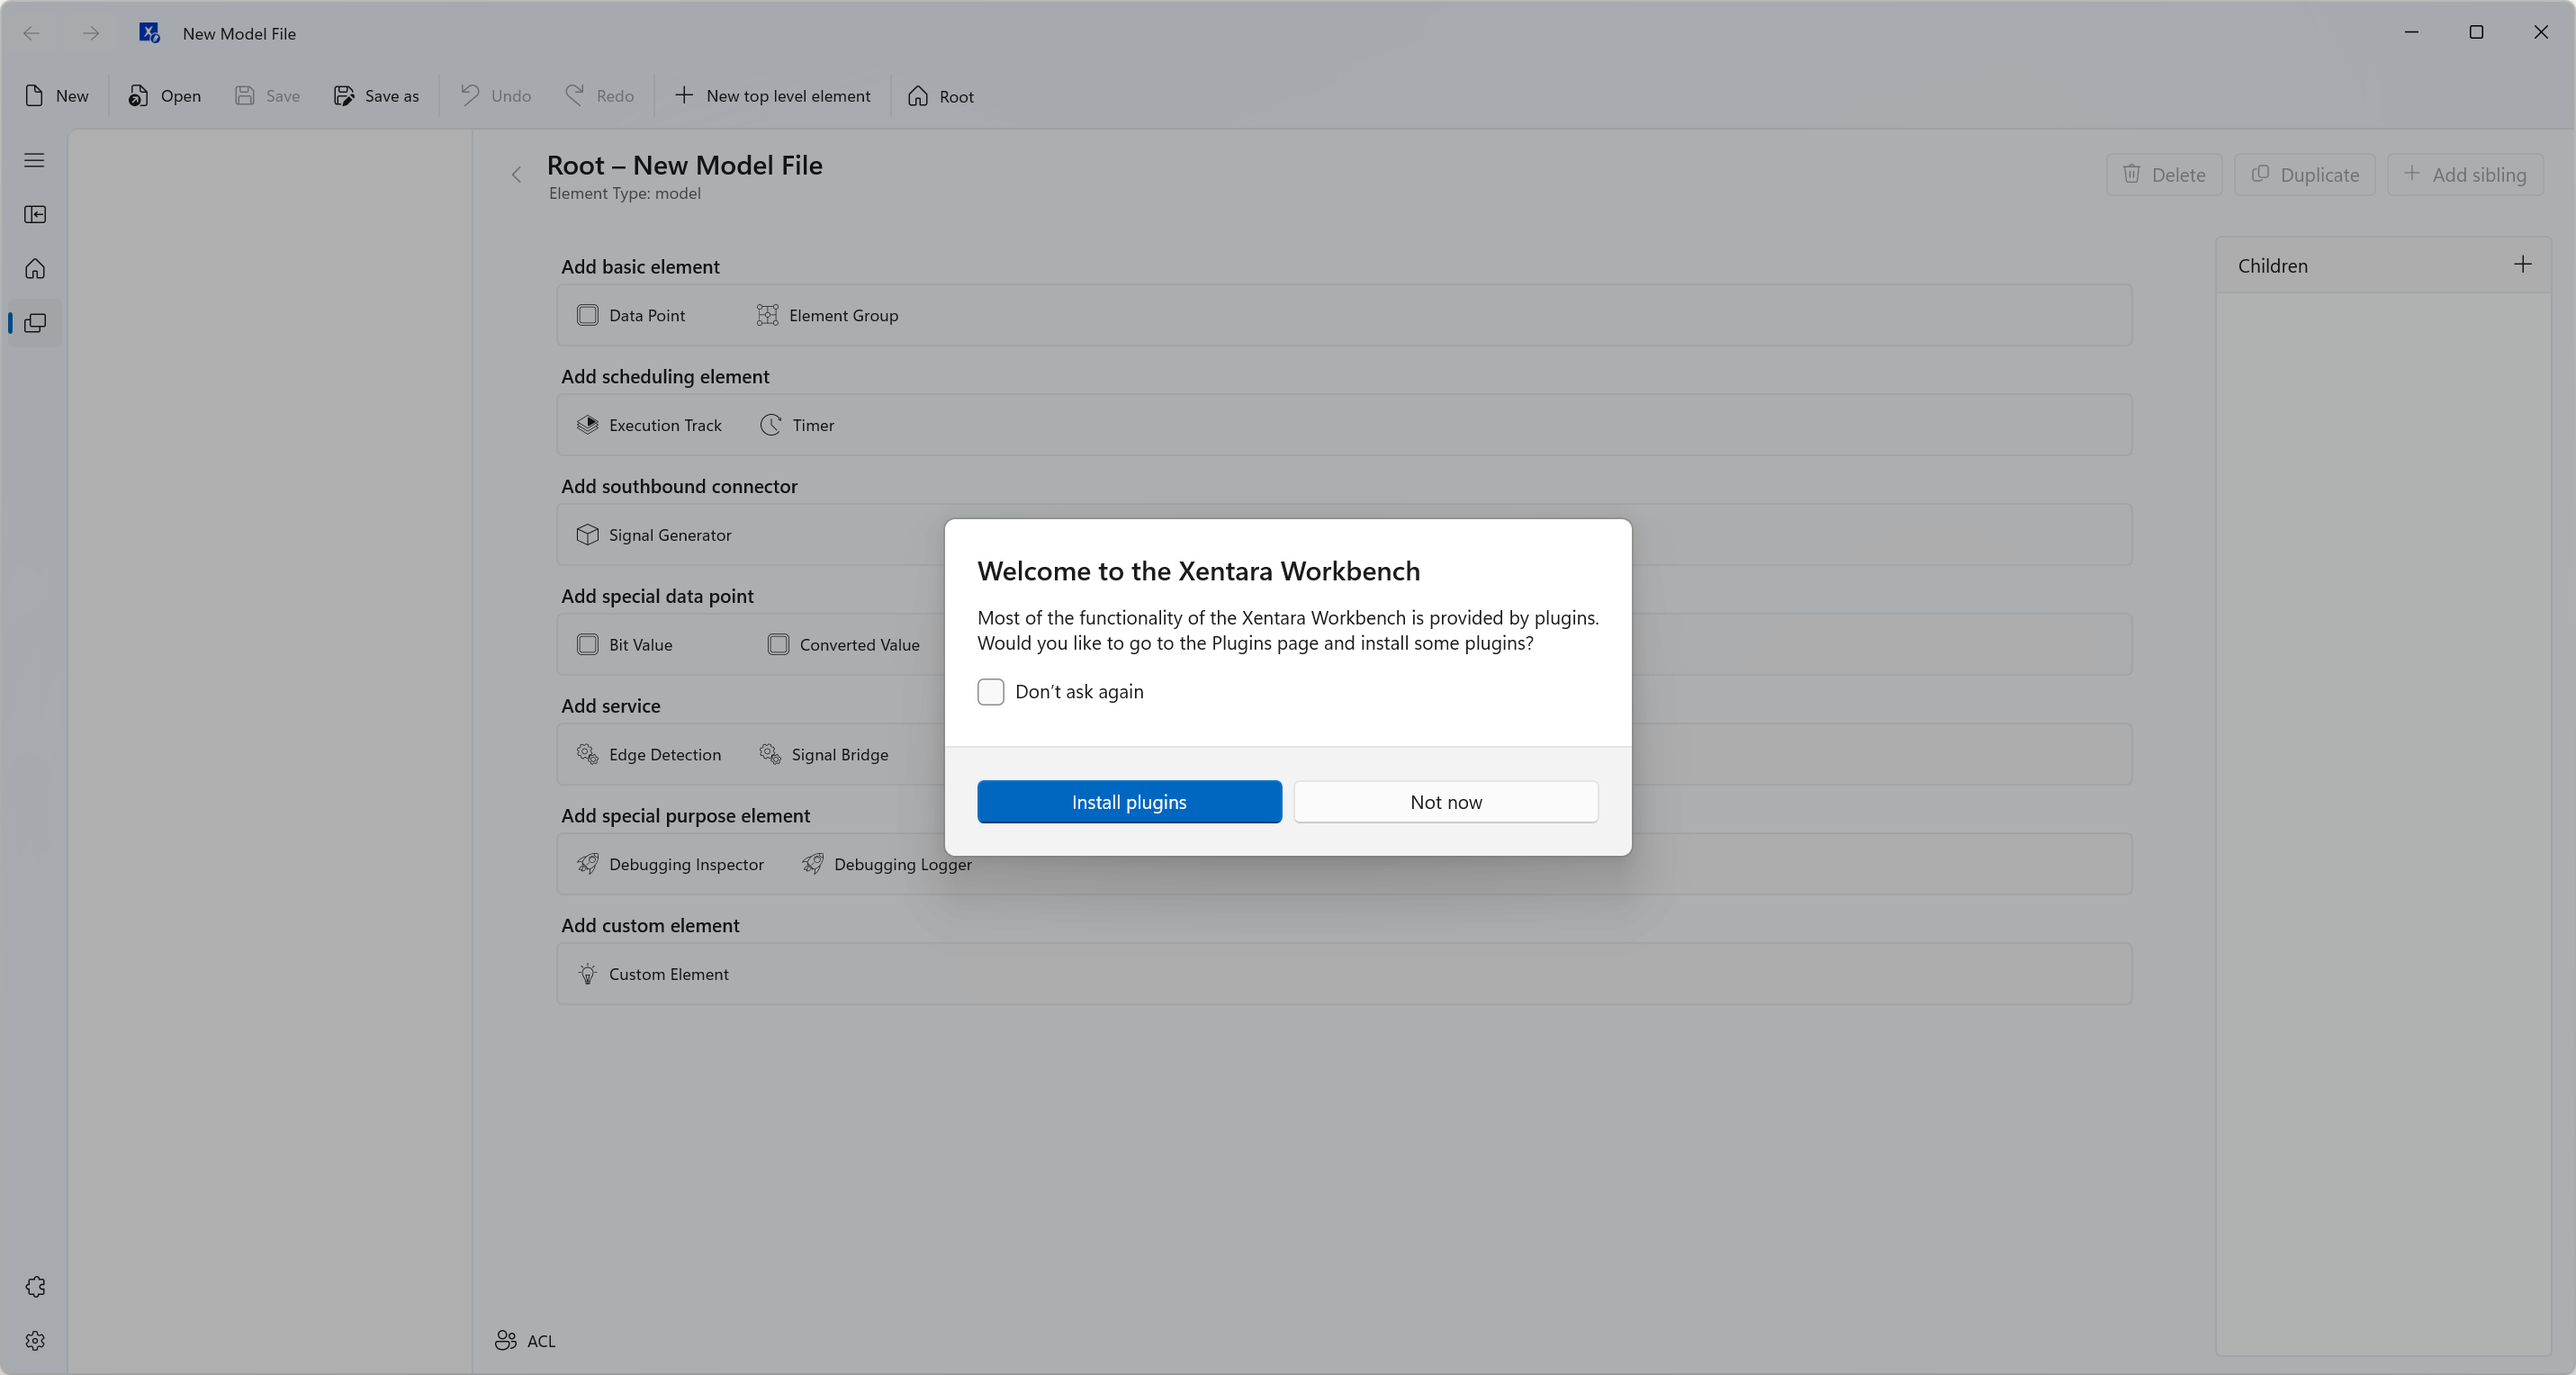
Out of the box, the Xentara Workbench supports all Xentara core functions like data points, the Timing Model, etc. However, if you are using Skills or Extensions to connect to other systems or for special purposes, you will need to install the relevant plugins for the Workbench. So click on "Yes" and you will be taken to a selection screen where you can choose which plugins to install. For now, choose the plugins for the buses or devices you are using and confirm. The Workbench has to be restarted after installing plugins.
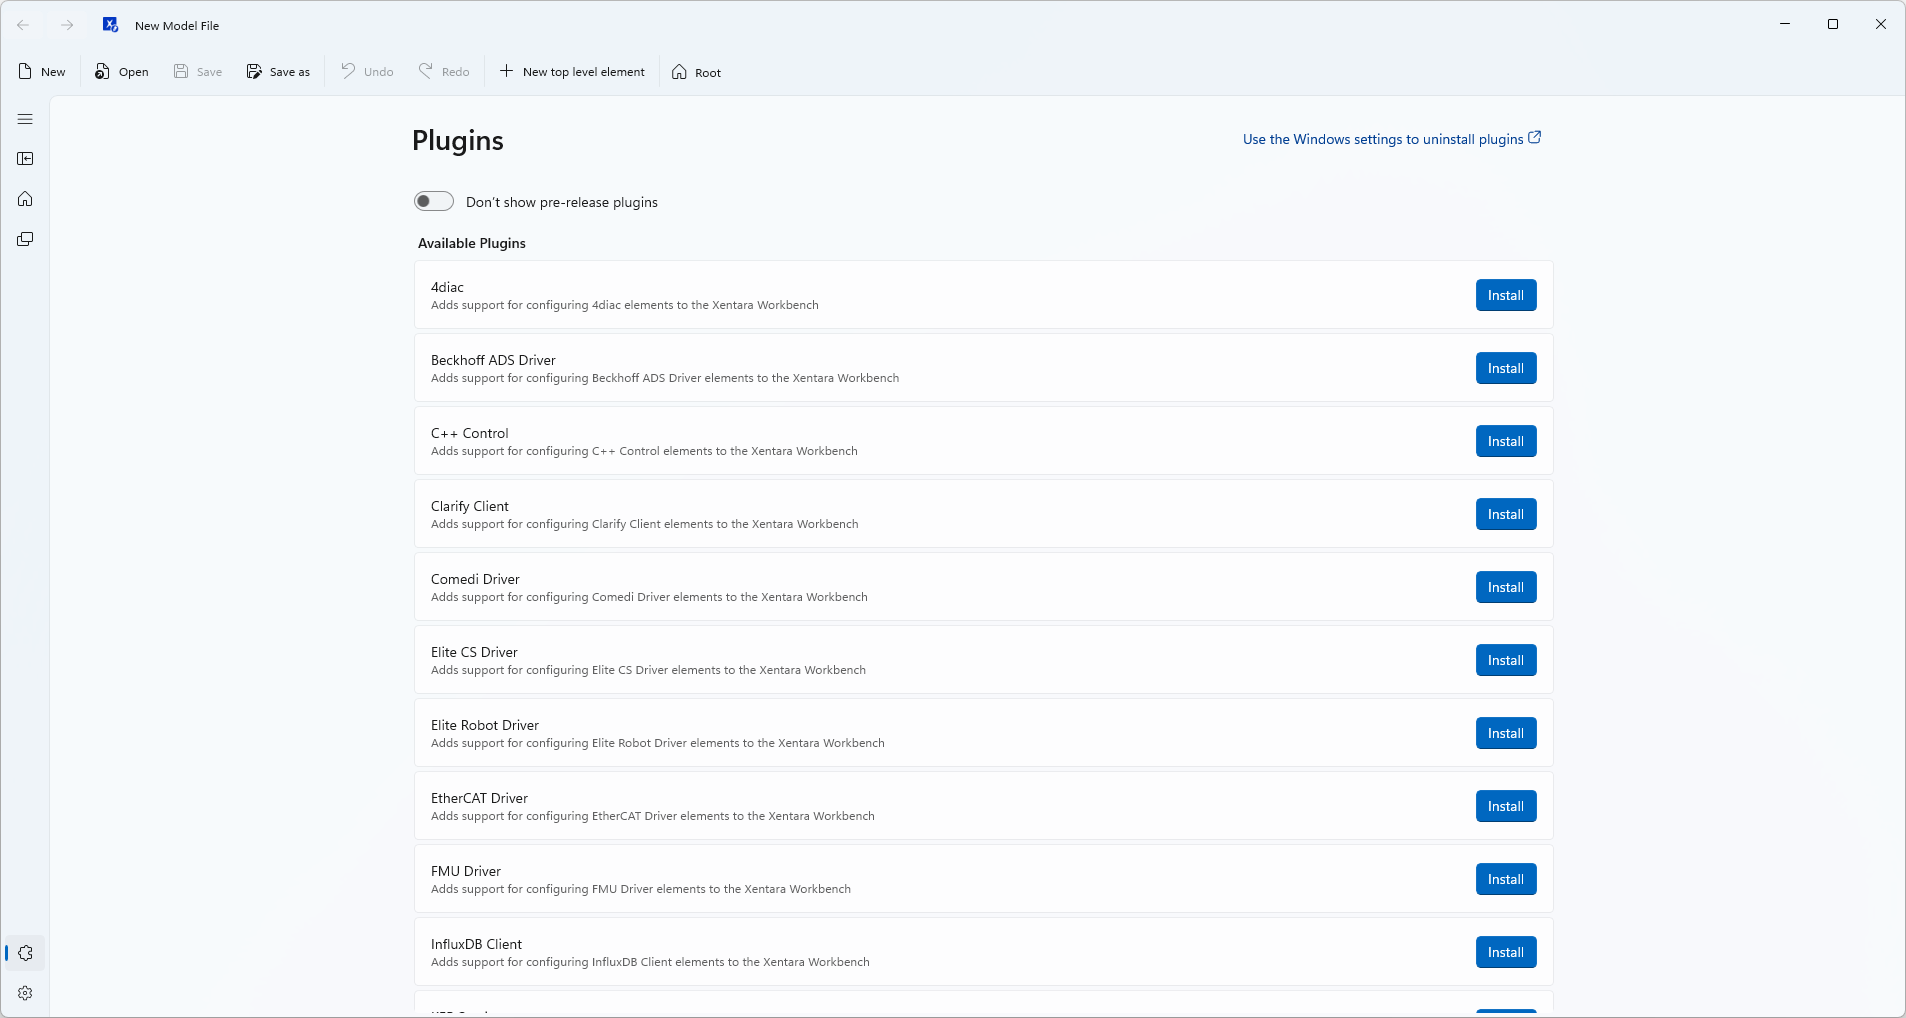
If you add additional Skills later or forgot to install a specific plugin, you can always return to this screen later by clicking on the "Manage Plugins" icon at the bottom left of the Workbench window.
💡 The plugin management screen allows you to show and install pre-release plugins. If you are not using a pre-release version of Xentara, you will not need any of those.
Uninstalling plugins is handled via the Windows Settings; a link at the top of the plugin management screen can take you there.
3. Screen Layout
Now that your Workbench is set up and configured, let's have a look at the screen layout.

On top of the window there is the Main Menu that should be familiar to any Windows user.
Running down the left edge is the Navigation Bar. You can expand it with the top button. From top to bottom, the functions are:
- expand / contract the Navigation Bar
- show / hide model Tree View
- go directly to the model Root element
- go back to the model screen from the settings or plugin management screens
- manage plugins
- settings
💡 The settings screen allows you to set the Workbench to Light or Dark Mode.
To the right of the Navigation Bar, there is a currently empty area. This is where the Tree View of your Data Model will be displayed.
The largest area of the Workbench screen is the Details Panel. Usually this displays detailed information on the selected object; since there is currently no model, it shows a selection of all available objects that can be added to the model. Part of the detail area is the "Children" box on the right. When an object is selected in the Tree View, this box displays that object's children and allows you to add more.
4. File Operations
File operations in the Workbench are simple. You can use the labeled buttons in the Main Menu to create a new model, open an existing model file, or save the one you're corrently working on.
For demonstration purposes, let's load a small model file as an example. You can find it under this URL (you may have to right click on your browser and choose "Save link as)": https://docs.xentara.io/xentara/sample-model.json
Now click "Open" in the Main Menu, navigate to the folder where you downloaded the model file, and open it.
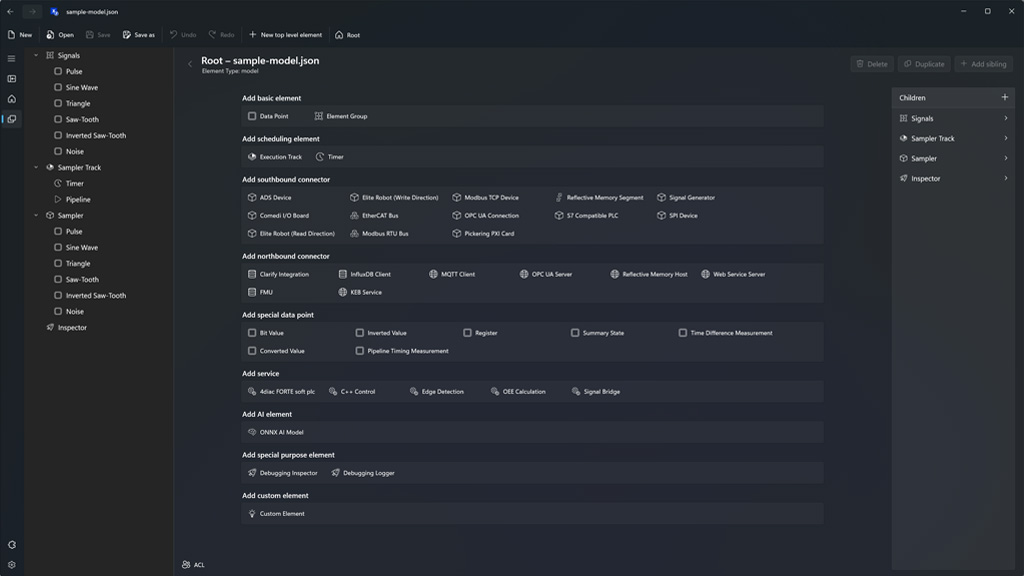
5. Navigating the Model
You can now see the Tree View of the loaded model. Like in most applications, clicking the small triangles to the left of an entry allows you to expand or collapse the underlying branch.
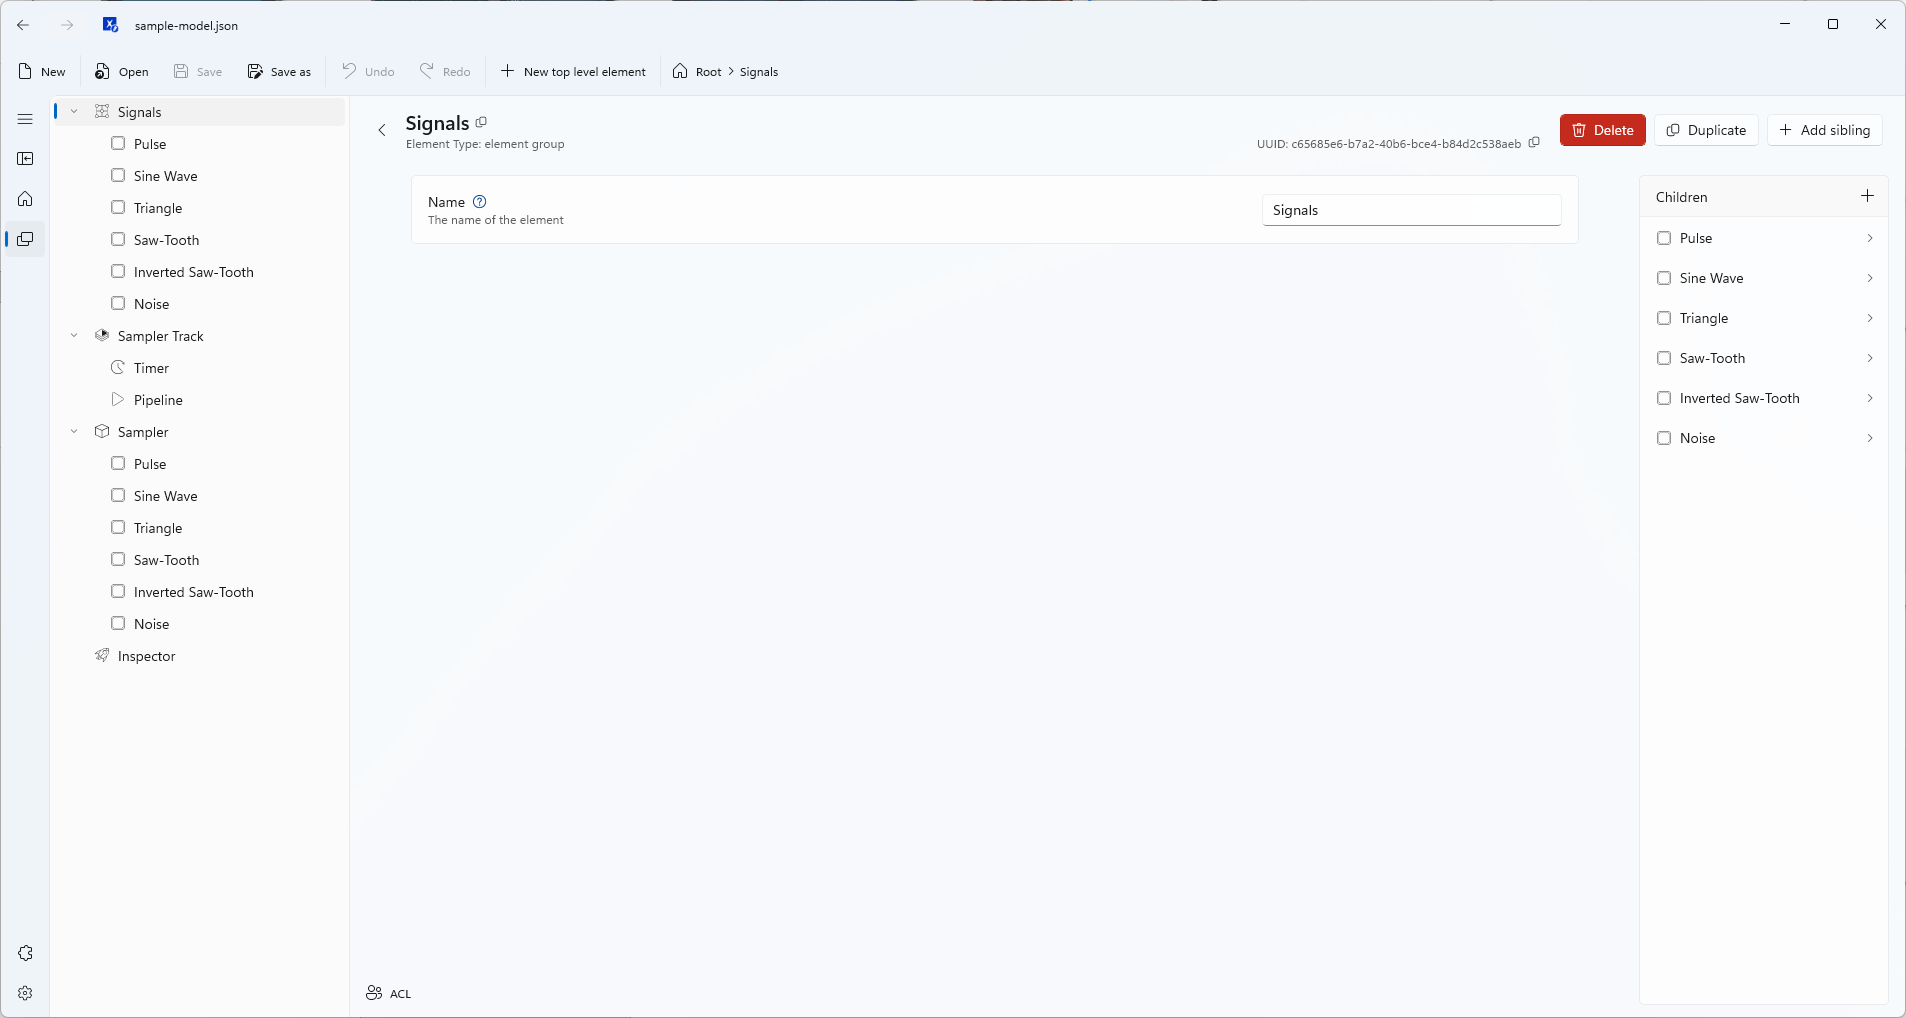
You can click on any item in the Tree View to see its configuration in the Details Panel. If you display the details of an item with children (e.g. "Signals" in the sample model), the child elements are listed in the "Children" box at the right of the Details Panel. Clicking any child on this list takes you to that child element's configuration.
Above the Details Panel are breadcrumbs showing the path from the model Root to the currently displayed object (e.b. "Root > Signals" in the screenshot above). Click on any point in the breadcrumbs to immediately jump to a higher object.
Clicking the back button to the left of an object's name at the top of the Details Panel will take you to its parent.
At the top left of the window are back and forward buttons to help you navigate back to other objects you have been editing.
Finally, clicking the "Root" button in the Main Menu or the Navigation Bar takes you directly to the model's Root element.
6. Editing, Adding and Removing Model Elements
All parameters of a model object can be edited in the Details Panel. For an understanding of what each specific parameter does, please refer to the Xentara Developer Documentation.
💡 Every parameter has a small "Help" button in the form of a blue question mark. Clicking this button displays a short tooltip with the most important info on this parameter.
To edit an object's Access Control List, which defines access rights per user or group, click the "ACL" button at the bottom left of the Details Panel. Note that the Root element also has an ACL. Since elements usually inherit the ACL of their parent object, this is the ideal place to set global rights and permissions.
To add a new element to the Root of the model, just navigate to the Root element and choose an object from the list presented onscreen or use the "New top level element" button in the Main Menu.
To add a child object to the object you're currently editing, click the "+" button at the top right of the "Children" box.
To add an additional object on the same level of the model tree as the object you are currently editing (e.g. adding a second pipeline to the same execution track), click the "+ Add sibling" button at the top right of the Details Panel.
Using the "Duplicate" button at the top right of the Details Panel, you can make a copy of the object you are currently editing that is inserted at the same position in the model tree. You can also right click the element in the Tree View and select "Duplicate" from the context menu. Please be aware that all child objects are also duplicated.
To remove an object from the model, click the "Delete" button at the top right of the Details Panel or right click the element in the Tree View and select "Delete" from the context menu.
New elements are automatically given a name based on their type. It is recommended to use unique, easily identifiable names for the objects in your Data Model.
7. Hints & Tips
- The Workbench constantly checks for errors in the model and alarms the user if any are found. An element with errors is marked with a red circle in the Tree View; the number within the circle shows how many problems have been found with this element. When displaying the object in the Details Panel, a red text box containing a short error description appears under any problematic parameters. If there are errors in sub-parameters, these are also marked with a red circle showing the number of issues.
- Every model element has a unique identifier, the UUID. This is displayed at the top right of the Details Panel. The UUID is used internally by Xentara so that an element can still be consistently identified after you change its name. The UUID can not be edited, but clicking on the small button right beside it copies it to the clipboard.
- Using the "Custom Element" type allows you to add your own JSON code to the model file. Please be aware that the Workbench can not check custom JSON code for errors, so use this function at your own risk.
- The "Undo" button on the Main Menu allows you to undo your last action(s). To restore them, use the "Redo" button. Both buttons will display the type of action they will undo or redo (e.g. "create new element").
- You can associate .json files with the Workbench to directly open Data Models from the Windows Explorer. Keep in mind though that the Workbench can not parse JSON files that are not Xentara Data Models. There is also an entry in the "Open with" context menu of the Windows Explorer that allows you to open a JSON file with the Workbench directly.
Share this article
If you found this article helpful, please share it with your friends!