
Introduction
Xentara is an industrial real-time control runtime - the kind of software that coonects to PLCs (Siemens, Beckhoff, etc.), talks to industrial fieldbuses (EtherCAT, Modbus RTU/TCP, etc.) and connects industrial gear to higher-level systems over OPC UA, MQTT, REST and the like. Until recently, getting started with it meant installing the full Debian package set on a Linux machine, requesting a licence, configuring users, and wiring it all together by hand.
The official Xentara Docker image (xentara/xentara-tryout on Docker Hub) collapses most of that into a single docker pull. This guide walks you through running it end-to-end: from a fresh Linux machine to a working Xentara installation with the bundled TUI App showing live Xentara data.
You'll need a Linux host (bare metal, VM, or 64-bit Raspberry Pi running Bookworm) with an internet connection.
What's in the Image
- Xentara runtime with the full Skill set: EtherCAT driver, OPC UA server and client, Modbus RTU/TCP, Siemens S7, MQTT, InfluxDB client, Eclipse 4diac, FMU driver, Webservice, Microservices, timing measurement, and more.
- Xentara TUI App: a terminal interface for live model browsing, included as the xentara-tui command inside the container.
- A sample model with synthetic signal generators (pulse, sine wave, triangle, saw-tooth, noise), so you have something to look at the moment everything is running.
- Multi-architecture builds for linux/amd64, linux/arm64, and linux/arm/v7. Docker pulls the right one for your host automatically.
What's not included: a commercial licence. Xentara is a commercial software, but a free trial is available at try.xentara.io and ties to your specific machine. We'll request it as part of the setup.
Step 1. Install Docker
If docker --version already prints a version on your machine, skip this section.
On Debian or Raspberry Pi OS Bookworm:
sudo apt update
sudo apt install -y ca-certificates curl gnupg
sudo install -m 0755 -d /etc/apt/keyrings
sudo curl -fsSL https://download.docker.com/linux/debian/gpg \
    -o /etc/apt/keyrings/docker.asc
sudo chmod a+r /etc/apt/keyrings/docker.asc

echo "deb [arch=$(dpkg --print-architecture) signed-by=/etc/apt/keyrings/docker.asc] \
https://download.docker.com/linux/debian \
$(. /etc/os-release && echo "$VERSION_CODENAME") stable" | \
    sudo tee /etc/apt/sources.list.d/docker.list > /dev/null

sudo apt update
sudo apt install -y docker-ce docker-ce-cli containerd.io \
    docker-buildx-plugin docker-compose-plugin
sudo usermod -aG docker $USER
Log out and log back in for the group change to take effect, then verify:
docker --version
docker compose version
docker ps
For other distributions, see Install Docker Engine
Step 2. Pull the Image
docker pull xentara/xentara-tryout:latest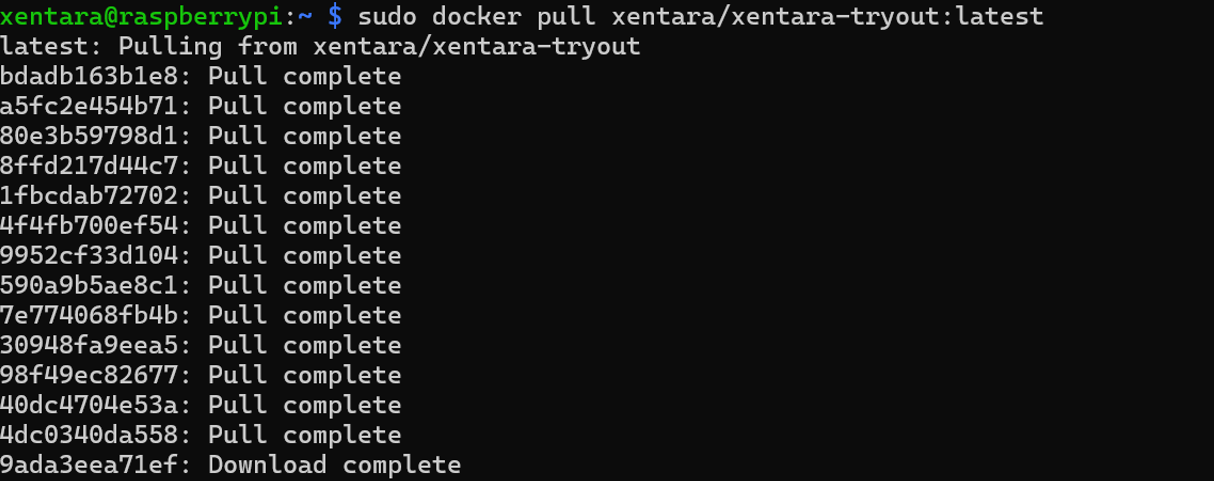
This downloads the architecture variant matching your host. On a Raspberry Pi 4 or 5 this is arm64 and takes about 60 seconds.
Step 3. Create the Compose File
Make a directory for your Xentara deployment and create a docker-compose.yml inside it:
mkdir ~/xentara-test
cd ~/xentara-test

cat > docker-compose.yml << 'EOF'
services:
  xentara:
    image: xentara/xentara-tryout:latest
    container_name: xentara-tryout
    restart: unless-stopped

    cap_add:
      - SYS_NICE
      - NET_ADMIN
      - NET_RAW

    privileged: true

    ulimits:
      rtprio: 99
      rttime: -1

    security_opt:
      - no-new-privileges:false

    environment:
      - XENTARA_TRACK=realtime
      - XENTARA_AFFINITY=3

    ports:
      - "8080:8080"

    volumes:
      - ./logs:/var/log/xentara

    command: ["/usr/bin/run-xentara.sh"]
EOF
The configuration grants the container the capabilities Xentara needs for real-time scheduling (SYS_NICE), networking (NET_ADMIN, NET_RAW), and a few related ulimits. Port 8080 is exposed so you can hit the Webservice from your local network.
Step 4. Start the Container
docker compose up -d
docker ps

You should see xentara-tryout running with port 8080 exposed. The container is up, but Xentara itself isn't, yet running. It can't start without a valid licence.
Step 5. Get Inside the Container
sudo docker exec -it xentara-tryout /bin/bash
You're now inside the container as the xentara user.
Step 6. Discover the Licence Requirement
Inside the container, run:
xentaraXentara will report that no licence is installed and print a URL containing your machine's unique node ID:
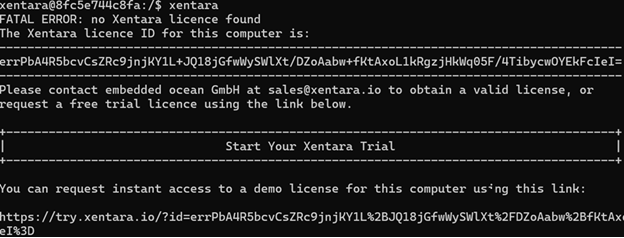
Copy that URL.
Step 7. Request a Trial Licence
Open the URL in a browser on any device. You'll land on Xentara Trial.
- If you don't have an account, register with your email.
- If you already have one, sign in - you'll get a secure login link by email.
Verify your email and follow the login link to reach the Trial Nodes dashboard. Click Add New Node and your machine's node ID (which Xentara printed above) is automatically detected and added to your trial.

Step 8. Deploy the Licence
On the Trial Nodes page, click Deploy on Linux.
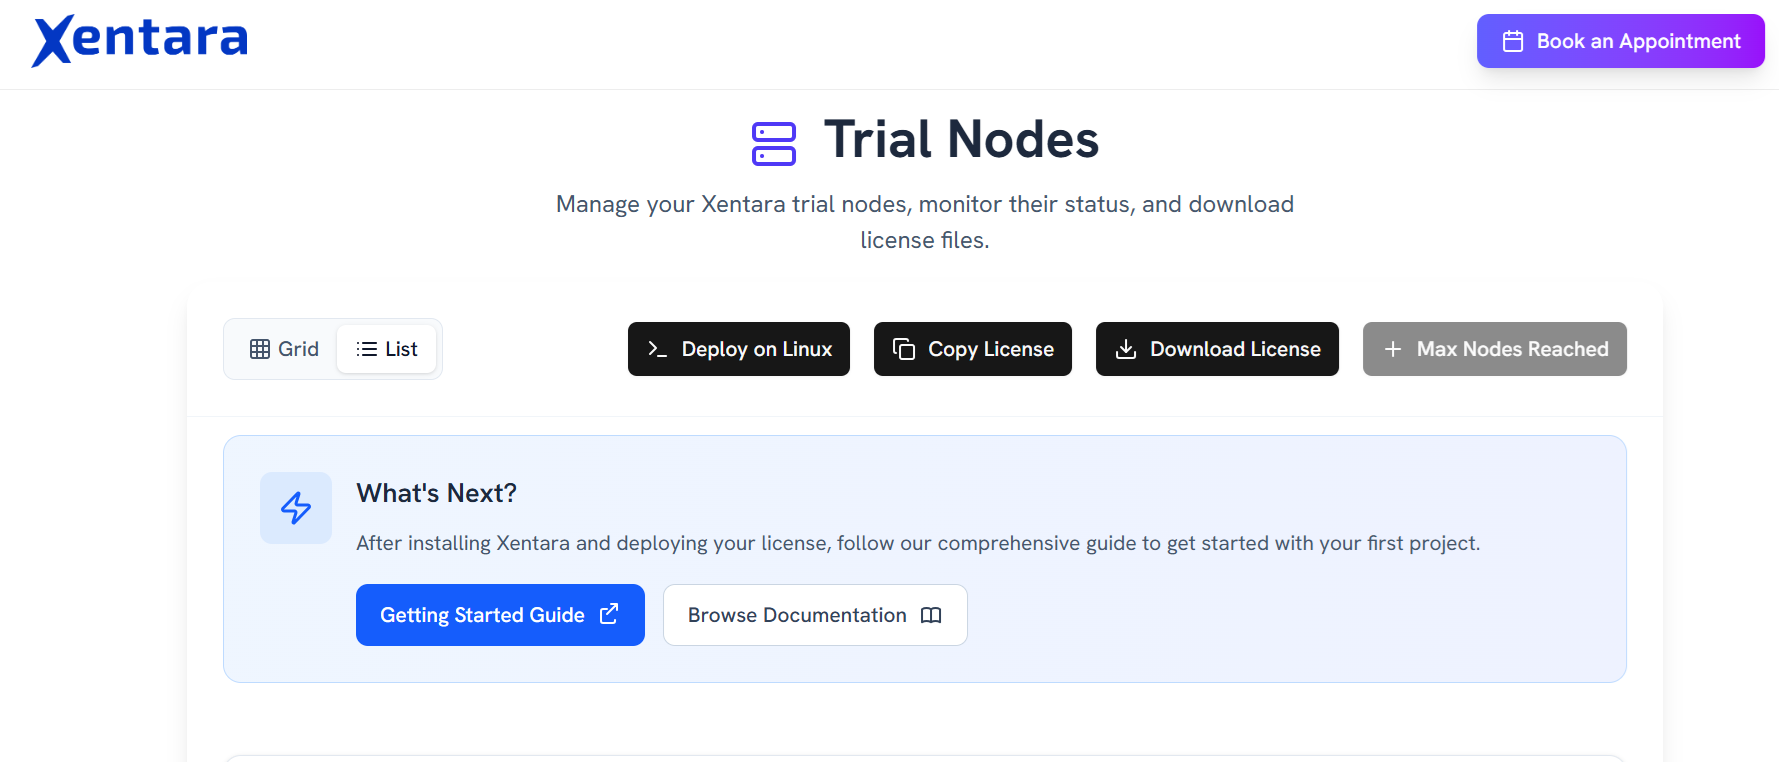
You'll see a "sudo mkdir -p ... && sudo tee ..." command containing your licence JSON. Click Copy Command.
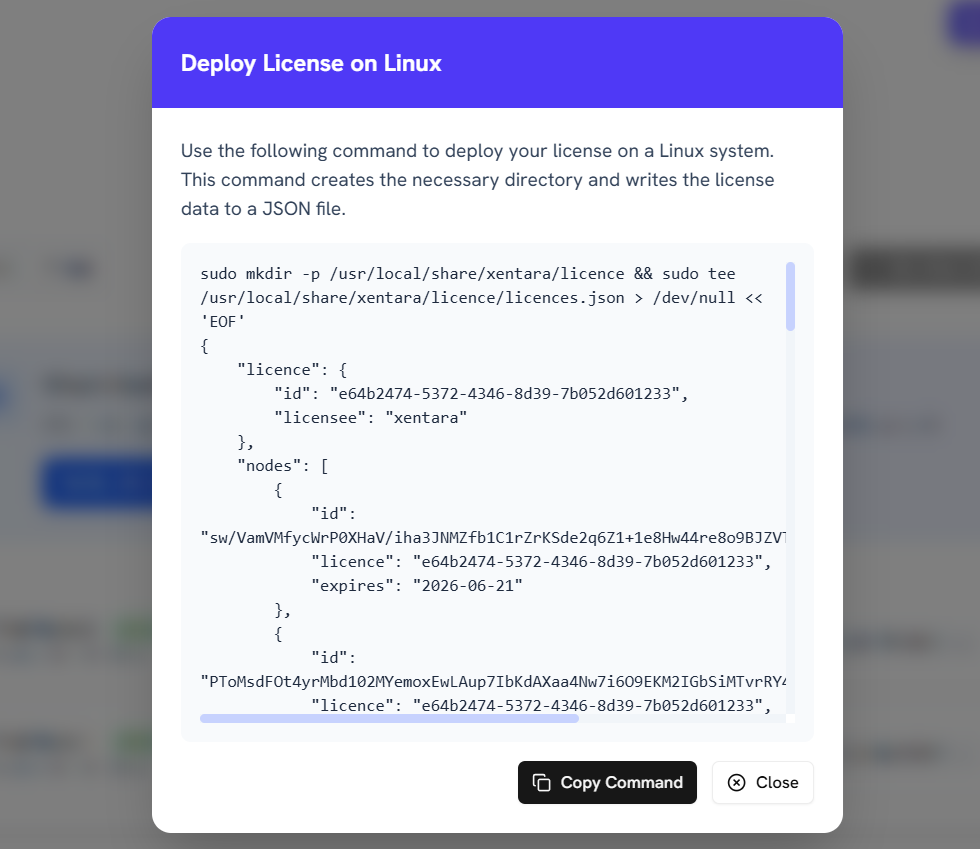
Back inside the container (the shell from Step 5), paste and run the command. It creates /usr/local/share/xentara/licence/licences.json with your trial licence. Now run Xentara again:
xentara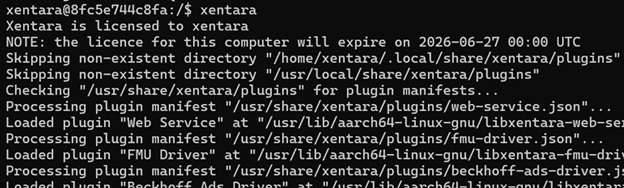
This time you'll see startup messages : plugin loading, the Webservice binding to port 8080, the timer pipeline firing. Xentara is now up and running.
Step 9. Set a Password for the TUI App
The Xentara Webservie uses Basic Authentication, and the image doesn't ship with usable credentials. You need to set one before the TUI App can connect.
While still inside the container:
xentara-password --dont-reject-insecure-passwords xentara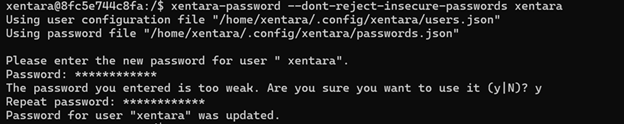
You'll be prompted to set a new password for the xentara user. The "--dont-reject-insecure-passwords flag" lets you choose a short or simple password for testing - drop it in production.
Exit the container:
exitStep 10. Launch the TUI App
From the host, with the container still running:
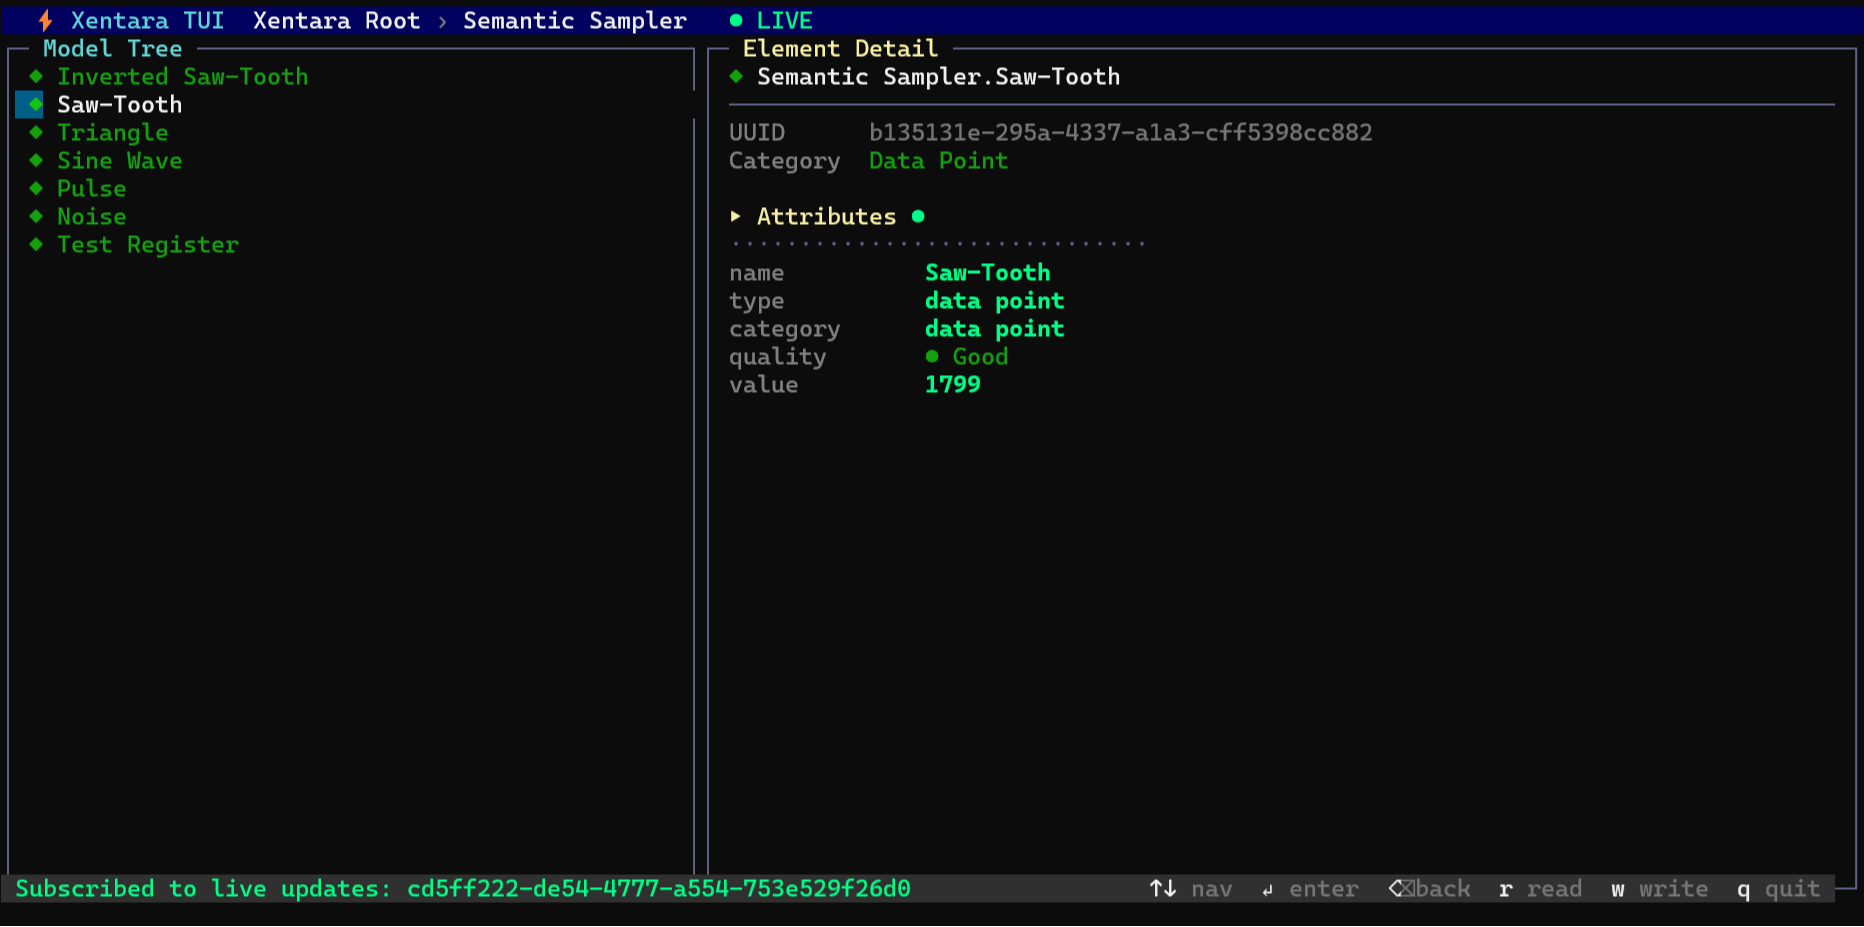
docker exec -it xentara-tryout xentara-tui --host localhost --port 8080 --user xentaraEnter the password you just set. The TUI App opens with the sample model - Inspector, Sampler, Sampler Track, and Semantic Sampler; visible in the left window.
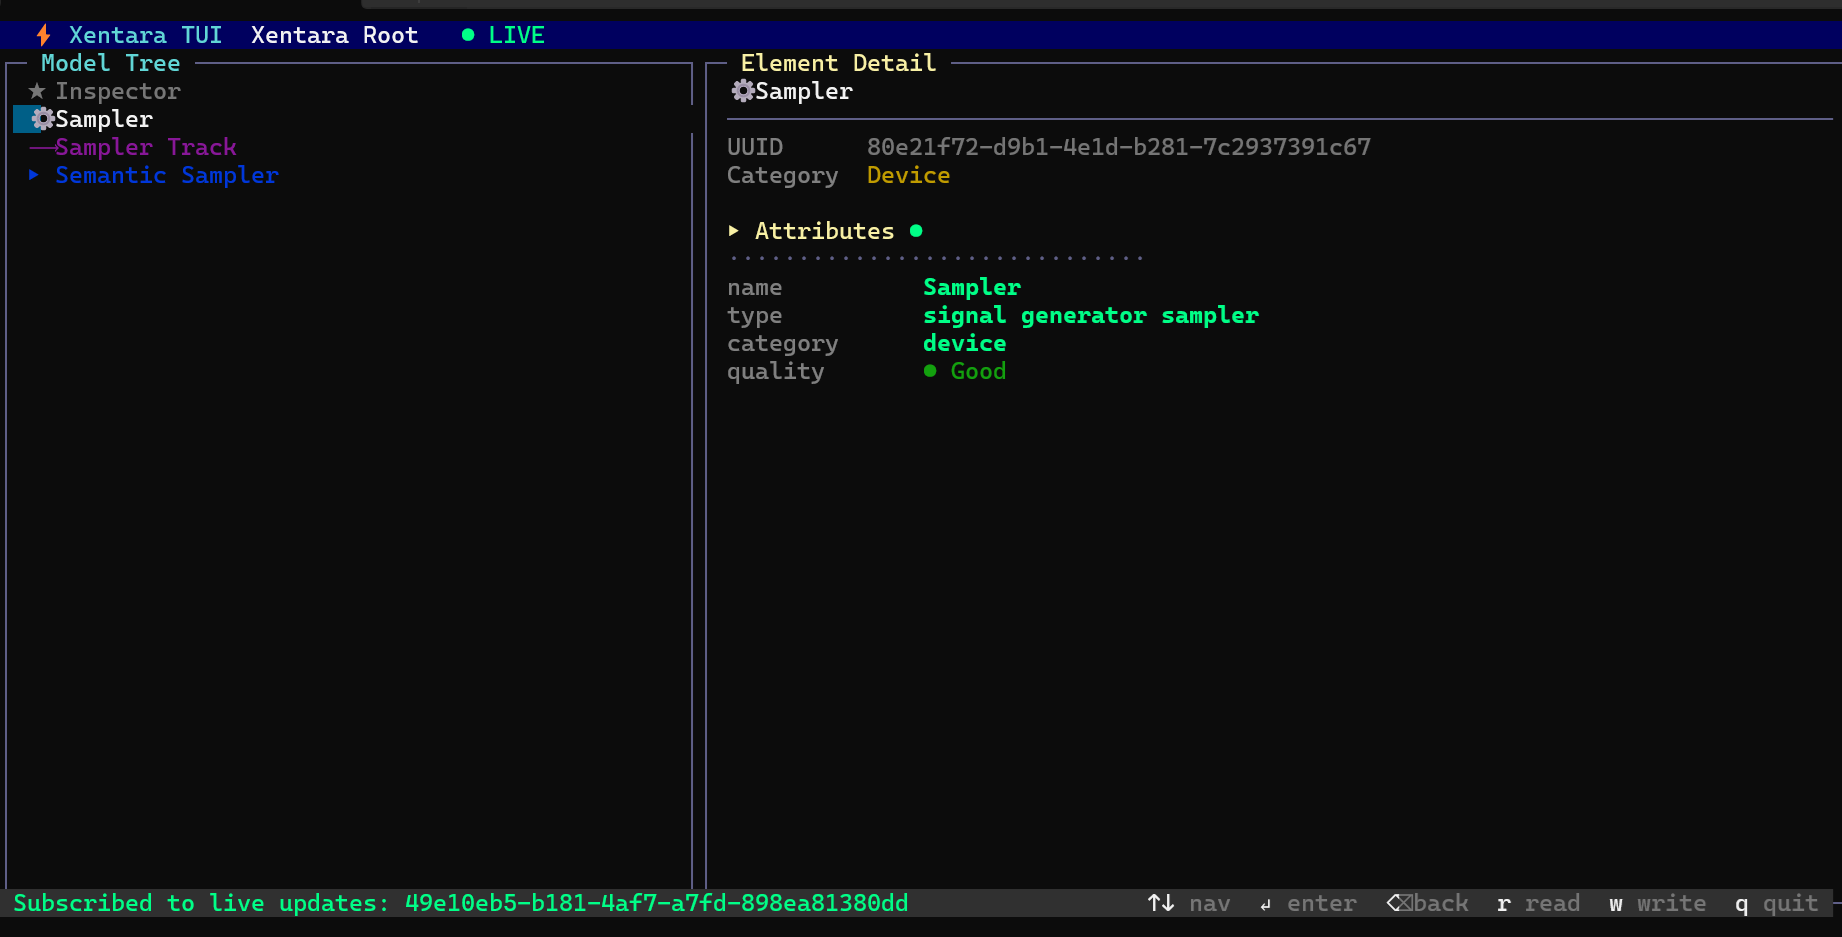
Drill into Semantic Sampler to see the synthetic signal generators (Pulse, Sine Wave, Triangle, Saw-Tooth, etc.). Each has a value and quality attribute updating in real time, driven by Xentara's timer.
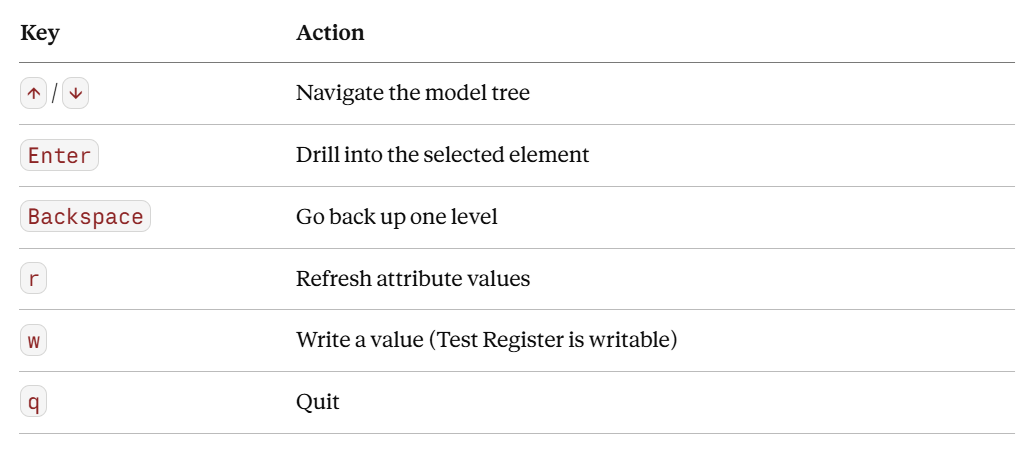
TUI App Controls:
Step 11. Write a Value to the Test Register
Most data points in the sample model are read-only - they're outputs of the synthetic signal generators, so the TUI App can display their values but not change them. The exception is Test Register, which is defined in model.json as a writable register specifically so you can try out the write functionality.
Inside the TUI App, navigate into Semantic Sampler and select Test Register. Press "w" to open the Write Value dialog:
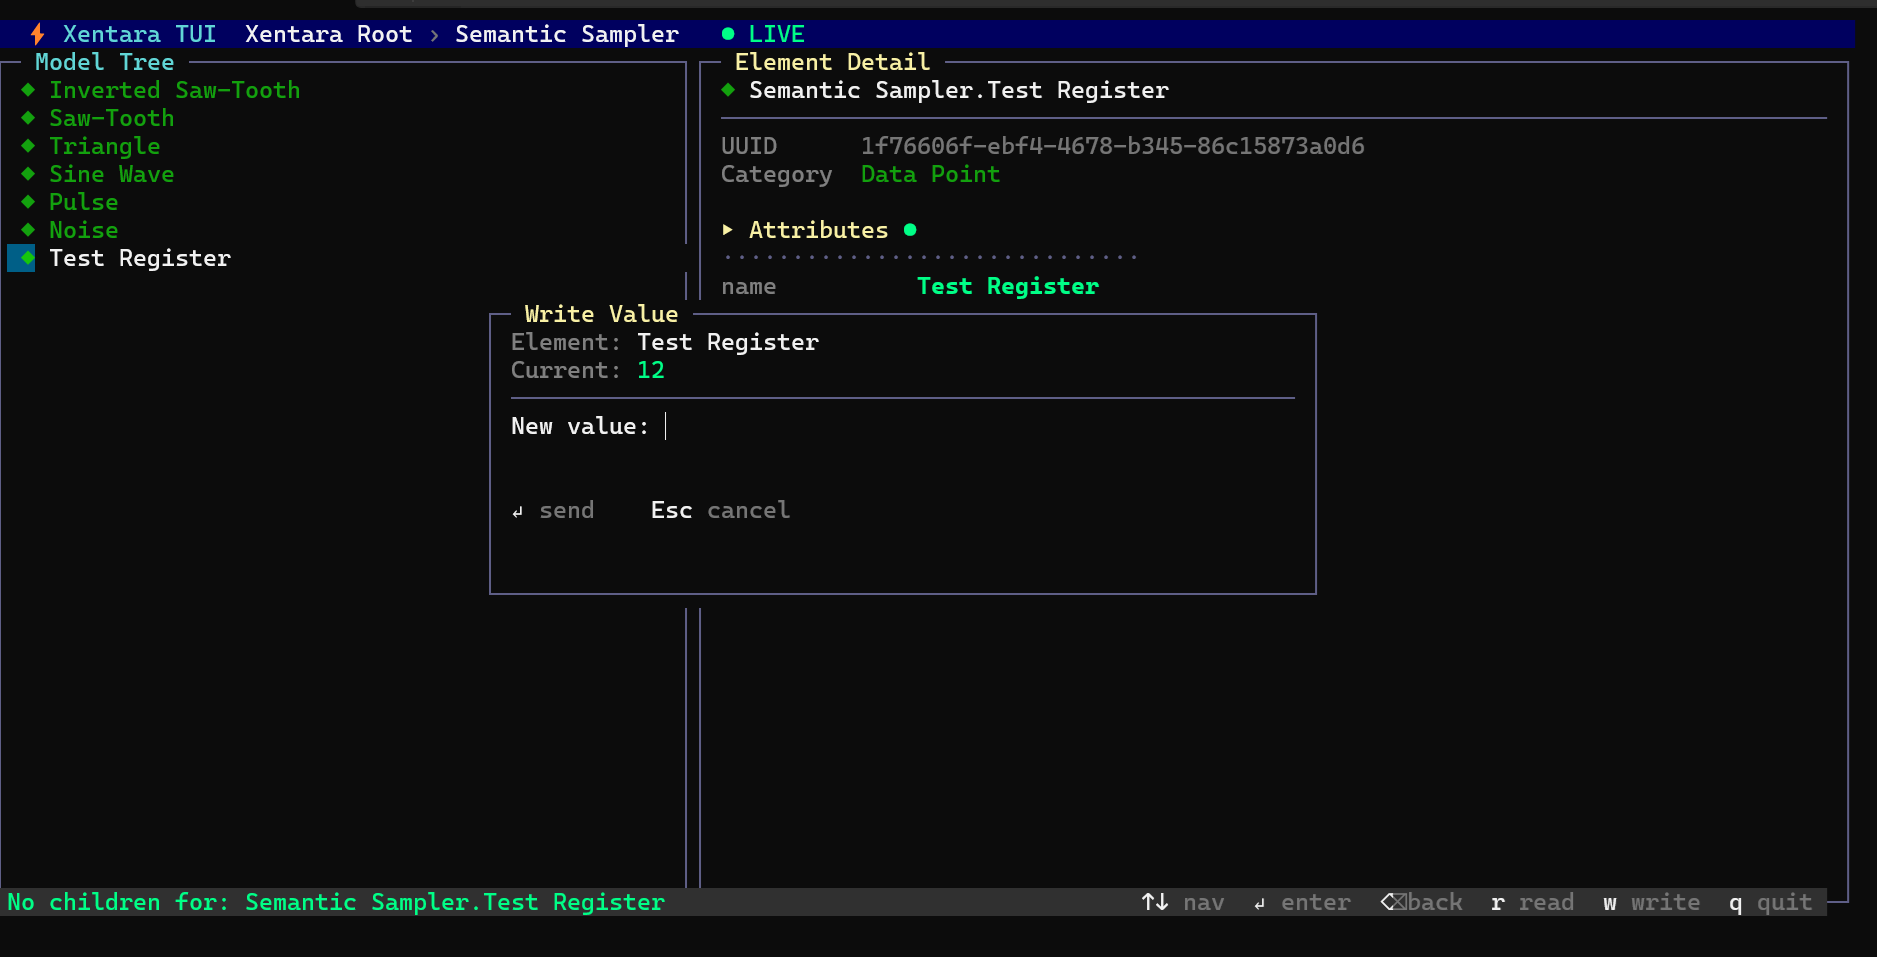
Type a new integer, press "Enter" to send it, and the value updates immediately. You'll see the new value reflected back in the Element Detail window on the right.
This is what the "w" command lets you do for any writable attribute. To make other elements writable, you'd define them as registers in model.json / see the @Skill.SignalFlow.Register entry in the sample model for the pattern.
Common Issues
Authentication failed (HTTP 401) in the TUI App. The password doesn't match. Go back into the container with docker exec -it xentara-tryout /bin/bash and re-run xentara-password --dont-reject-insecure-passwords xentara.
Licence is lost after docker compose down. The licence file lives inside the container at /usr/local/share/xentara/licence/licences.json and disappears when the container is recreated. To persist it, add a volume to your compose file:
volumes:
  - ./logs:/var/log/xentara
  - ./licence:/usr/local/share/xentara/licence
Create the host directory (mkdir ./licence) before bringing the container up, then redeploy the licence one more time. From then on, it survives restarts.
The container starts but Xentara fails with no Xentara licence found even after deploying. Make sure you ran the deploy command inside the container, not on the host. The node ID is computed per container - deploying it on the host won't help.
Conclusions
The TUI App is just one way to interact with Xentara WebSocket. The same WebSocket API powers HMIs, dashboards, and any custom client you build on top.